How to dye red eggs
Our step by step guide to dye red eggs for your next Red egg and Ginger party.
This post contains affiliate links and I may receive a small commission at no extra cost to you. I only recommend products I believe will be helpful. Thanks!
9/12/20235 min read
We cannot forget about the most important part of the Red Egg and Ginger party.THE EGGS! My family helped prepare the red eggs for our son’s party and it honestly took less than ½ a day to complete. We had many relatives asking to help and splitting the egg dying up really helped. My advice is always accept help if it’s offered, especially if they’re willing and capable! It was also nice to hear different techniques that others used. In Chinese tradition, the eggs symbolize new life and new beginnings. Red symbolizes good fortune and happiness. At the party, red eggs will be given to guests to represent new life and good fortune.
Egg dying seems like the least fun thing to do in terms of party prep and honestly was the most dreaded task I had on my to-do list. So I was glad for all the help from family and friends. Also, I did find options from many restaurants that charged almost $1 per egg, so if it’s in your budget to purchase by all means do so. For me, dying eggs was something thankfully we had figured out from my nieces and nephews parties and I didn’t mind the work since we had a lot of hands to help. Also, I knew we were not going to dye an egg for every guest. I have found that more of the older generation really look for the eggs and want to take them home. So we did 1 egg for every 2-3 guests.
I am here now to share those tried and true methods in 3 steps.
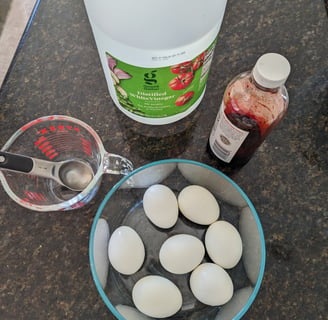
STEP ONE: Gather your supplies
Supplies you'll need:
Large stock pot or pot (size depends on the amount of eggs you need)
Eggs (You'll need 1 egg for every 2 or 3 guests)
Water to cover eggs
Ice
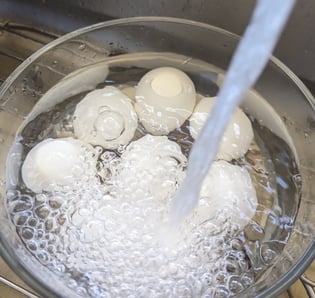
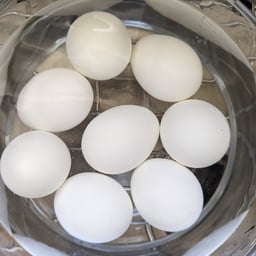
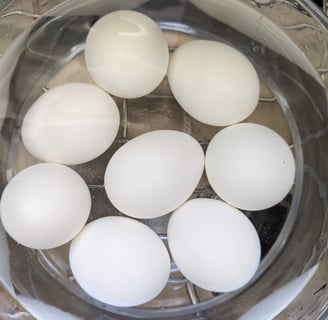
STEP TWO: Hard Boil the eggs
Hard boiling eggs. I used to love eating hard boiled eggs as snacks until I had my son and got totally sick of it cause that was all he ate for a long time. Now I'm kind of craving a hard boiled egg, so maybe I'm back! My tried and true recipe that is super easy comes from Eating Bird Food's blog, I'm linking it here and I've also added it down below in case. I usually do the full 12 minutes to get a full cook on the eggs.
Prep time: 5 min Cook time: 12 min
Ingredients
4-6 eggs
Large stock pot or pot (size depends on the amount of eggs you need)
Water
Ice
Instructions
Place eggs in a large saucepan and cover with water by at least 1 inch. Bring water to a boil over high heat. Let the water rapidly boil for 30 seconds, cover and remove from heat. Let sit 4-12 minutes. 4 minutes for jammy eggs or 12 minutes for fully hard boiled eggs and 8 or 10 minutes for somewhere in between. I like 6-8 minutes for hard boiled eggs that I’m going to eat for breakfast or but some where around 10-12 for hard boiled eggs I’m using for egg salad or tuna salad.
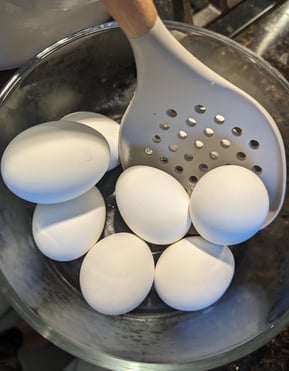
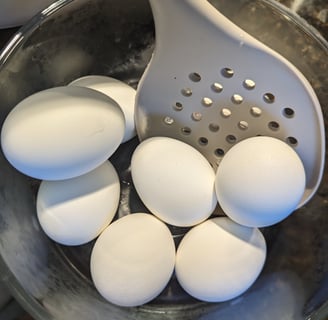
Once eggs have sat for the allotted time, drain water or use a slotted spoon to remove the eggs from the hot water. Transfer eggs to a bowl of ice water or place the eggs in a colander and run cold water over them. Either of these methods will stop the cooking process and cool the eggs.
Peel eggs by tapping all over to crack. Remove shell, starting at the larger side of the egg (with the air pocket). Serve/use immediately or peel + chill and enjoy once cold.
We also used an Instant Pot, which is my Mom's preferred way to hard boil eggs. I personally find it easier and simpler to use a pot and water, but she swears by it and it definitely works! So here is the recipe strait from Momma Must Have Parties mouths text message to me.
Mom: Boiled eggs: “5-5”
One cup water in pot. Add rack. Put eggs on rack. Manual for 5 minutes. Natural release 5 minutes
Prepare bowl with cold water. Add ice. Then after eggs are done add to ice water!
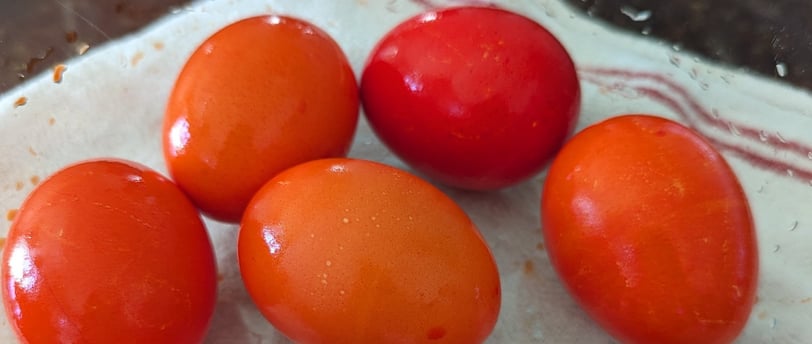
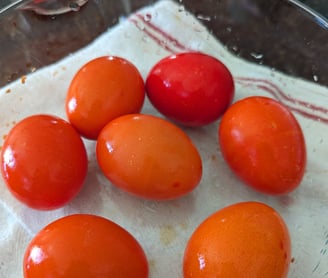
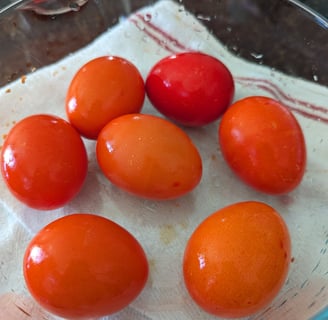
STEP THREE: Dying the eggs
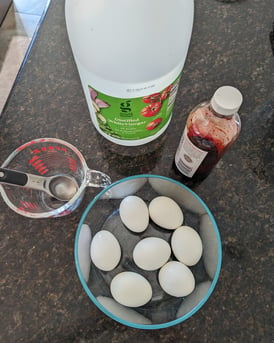
Supplies needed:
Water lukewarm
Glass or stainless steel bowl
Spoon Metal or other material that isn't easily stained and without sharp edges
Paper towels
Disposable gloves (optional)
Instructions:
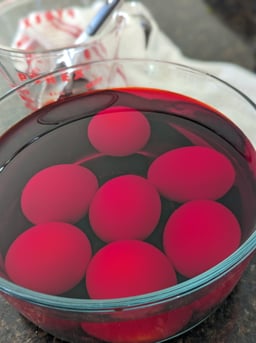
After hard boiling eggs and allowing them to cool, place eggs in a glass or stainless steel bowl to avoid staining.
Depending on how many eggs you have, pour by the cup over the eggs to cover completely.
Mix in Vinegar and red dye. For every 1 cup water - 1 tbsp of vinegar. For every 3 cups of water use 1-1.5 tbsp of red dye.
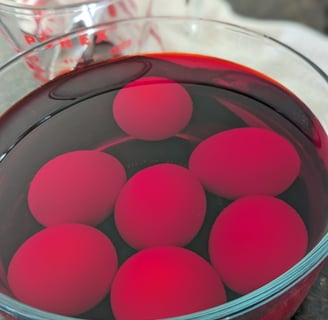
Let eggs sit in dye, water and vinegar mixture for 15 or more minutes stirring occasionally.
Drain water from eggs, this is where using disposable gloves and paper towels might be helpful. The red dye can be pretty stubborn if it gets on fingers, clothes or surfaces.
Tips:
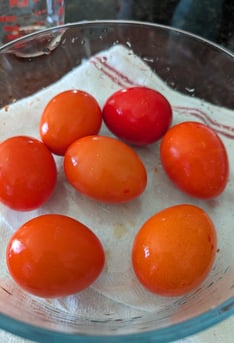
Save the egg cartons to place finished red egg for easy and safe transport/storage.
The eggs should be fine for 3-4 days, I have not tested how the dye does any longer than that.
I would have loved to test red dye alternatives, as there has been so much research showing red dye 40 can cause negative health outcomes. I saw some options for beet powder. I’ll update this post if I have a chance to try red dye alternatives or if anyone has tried red dye alternatives please share!
My auntie who shared this recipe suggested using brown eggs if possible. I think this would be helpful as I think you'd get a deeper red result.
If you have leftover they last pretty long and you can make so many other recipes with them if you don't mind pink egg whites.
Happy egg dying!

This post contains affiliate links and I may receive a small commission at no extra cost to you. I only recommend products I believe will be helpful. Thanks!
Subscribe newsletter
Must Have Parties is reader supported. When you buy from links on this site, I may earn a small commission. I only recommend products I believe will be beneficial to the readers. Learn more here.