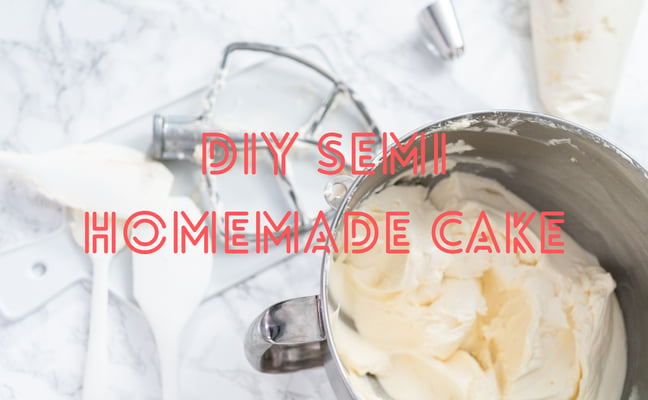
DIY Semi-homemade cake
Semi-homemade cake.
DIY
This post contains affiliate links and I may receive a small commission at no extra cost to you. I only recommend products I believe will be helpful. Thanks!
10/2/20233 min read

How do you create a unique cake without breaking the bank? Costco to the rescue!
We ordered a Costco cake which was extremely easy. Just order 2+ days before at your local Costco Bakery. Then on the pick up on your specified date, the cake will be waiting for you in the cake fridge! Zero interaction with another person or any use of tech needed just good ol' paper and pen. I thought ordering the cake would be the easiest part, but honestly this cake was so easy to make! Plus Costco cake is really tasty!
Of course I recruited my sister to come help, so thankful she's up for new challenges! I ordered an all white cake so it would be easier to dye and work with. I think it turned out pretty great, especially for only $24.99! Thankfully, I had most of the supplies I had on hand already and I borrowed my mom’s piping kit.
Supplies needed:
Butter knife
Large mixing bowl (suggest stainless steal or glass to avoid any red stains)
Tin foil or wax paper or parchment paper
Plastic wrap
Sprinkles (optional)
Pipping bag and tips (optional)
Step 1: Using the offset spatula gently take off the white flowers and set aside for later (optional). Gently, scrape off all the frosting and place in large mixing bowl.
Step 2: Mix red dye into the frosting until satisfied with the shade. Set aside.
This post contains affiliate links and I may receive a small commission at no extra cost to you. I only recommend products I believe will be helpful. Thanks!
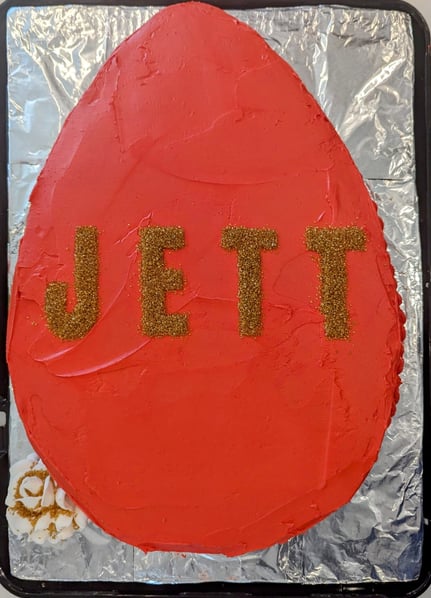
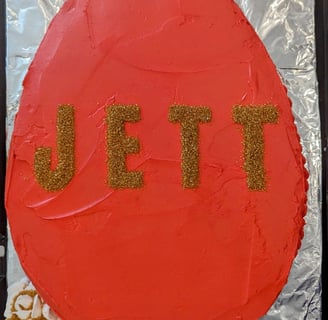
Step 3: Next I use a butter knife to lightly outline the egg shape on the cake. We wanted this cake to be impressive, so I tried to maximize the whole cake. But the size obviously is up to you. Once you have the desired shape/size, cut along the outline, saving the scraps for munchies or other cakes.
Step 4: To make it look slightly more professional, we slipped under the cake tin foil then plastic wrap on top to remove later and create a cleaner base. Looking back I might have used parchment paper or wax paper instead of foil.
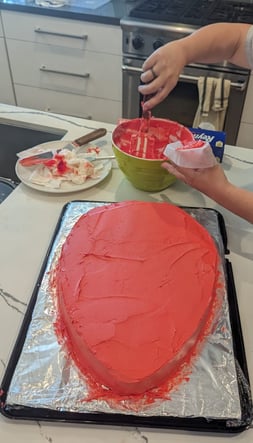
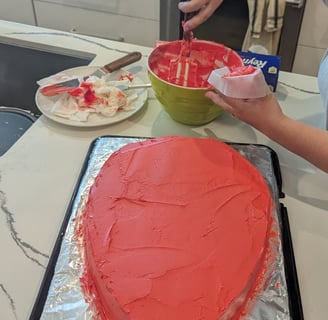
Step 5: Using the offset spatula again, re-frost the cake using the red frosting. Try to keep it as smooth as possible.
Step 6 (Optional): To add a bit of pizazz and break up the gigantic egg, we printed out my sons name, then cut it out to make a stencil. Hovering over the cake with the DIY stencil, center the stencil, then lightly lay it on the cake and sprinkle. Try to keep excess sprinkles to a minimum as they're hard to keep from falling when removing the stencil. Before removing the stencil, gently pat in the sprinkles to ensure they stay in place. Then remove the stencil.
A few tips I’d try for next time:
A natural red dye - I saw some beet powder, I just didn’t have the time if the red dye alternatives didn’t work out.
Use the scrapes for smaller egg cakes or whatever theme you are going for. I thought it would be so cute if we had a bunch of smaller eggs in different shades of red.
I would also use wax paper or parchment paper instead of tin foil as I think it would look better.
I had a really fun time creating this cake and honestly trying to figure out what other designs I can create using these methods.
Image: Filling the piping bag to decorate the edges. The bottom still has plastic wrap which will be removed for a cleaner look.
Subscribe newsletter
Must Have Parties is reader supported. When you buy from links on this site, I may earn a small commission. I only recommend products I believe will be beneficial to the readers. Learn more here.